Showing posts with label quilted wall piece. Show all posts

Tuesday, June 3, 2014

Quilted Wallhangings and Wildlife


 I have been long-arming so many quilts and having escapades and computer/social adventures, that I have neglected this blog site  sorely.  My apologies.
I will try to earn your love again by sharing all that I can. 
Macaw for Client
I have been growing in so many directions lately:  personally, creatively, and educationally.  I have been quilting for clients and sometimes finding the time to quilt from my creative streak.  The Macaw is a wonderful example of what long arm quilting can do to lend form to a piece.  It was a very abstract top when my client gave it to me.  I studied photos of Macaws (via Pinterest and Google) for several days.  I have been discovering that taking the extra planning time really does make a better quilt.  I have even taken to marking quilt tops!
Quilts for Paws Project:  Merlin
  The Quilts for Paws project is a slow success.  I have not had an outrageous demand, but I have managed to get Shadow his surgery.  He is the happiest he has ever been in life.  It is quite nice to see.  I will continue this project as I do believe it is a good cause.  I did not begin is it just to help my animal and I would still like to help other animals get the veterinary care they need.
  Spring has finally come the Rockies.  We have had lots of rain so everything is really green and gorgeous.  This particular moose has been roaming the neighborhood.  We named him Mickey because his antlers kind of look like Mickey Mouse ears in the this photo. 
Mickey the Moose
Some of my focus lately has been developing my other social media sites.  It has become quite a long list actually.  Let's see, www.mountainjoyquiltndye.Etsy.com and this blog were my first social sites.  Now, I have added:  www.mountainjoyquilts.com, www.facebook.com/mountainjoyquilts,
I am so addicted to my Pinterest for great inspirations and a place to share my work,
a not so active linked in profile,
and personal FB   --Whehh! It takes 2 cups of coffee in the mornings just to check them all for comments.  I love getting comments! 
I promise to write and share more often again!  Keep quilting and creating!

Monday, September 17, 2012

It took quite a while for me to get these personal quilts done, but perseverance pays off.  I love my bedroom now.  Here is a photo of the quilt made from our wedding Huppah and the signature quilt of wedding guests on the wall.  The quilt has my favorite design, The Seed of Life.  I went very simple with my quilt, it does not have any bias tape on it.  I usually make the seed look stained glass with black bias tape and then I have been known to lay down miles of colored bias tapes in Celtic knot work around the borders.  (Visit my website gallery to view several versions of this great design, www.mountainjoyquilts.com). 
I had a very busy weekend with the 1st Annual Gilpin County Artist Open Studio Tour.  I had over 30 people come visit my studio which is really good considering how far from the beaten track I live.  Everyone was just delightful.  They loved my work, my long arm, and my funky mountain home.  It was a great experience for me and I loved meeting all the new people. 
Looks like rain today or possibly our first snow?  I must get to work now, I have a queen size quilt to do today.  I hope everyone has a fabulous week!  Keep on creating!

Sunday, April 25, 2010

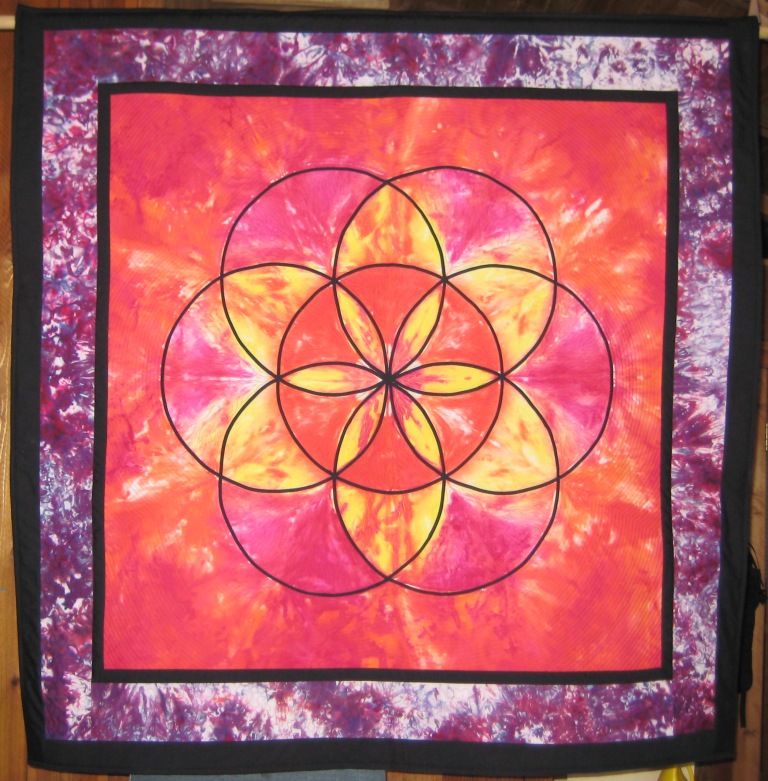
Seed of Life Quilts


The Seed of Life is an ancient and universal design. It employs sacred geometry and is said to represent all life here on this beautiful planet of ours. It was introduced to me by my first quilt client as the Flower of Life. For that quilt, I used only the center (The SEED) and did it in Mardi Gras colors. It was applique piecework and surrounded by Celtic knotwork. I have created many versions of this design. Most have the Seed in the center and Celtic knotwork around the borders. This one is the most recent version and up for sale on my Etsy site(hence the digital photo). I will be sharing the other versions also. I just need to scan them and fiddle with the sizes. The quilts are quite different from each other because of the colors and techniques employed during their construction. I learned something new with each version. I also learned how to make my husband tie-dye the design so I wouldn't have to applique it any more. That really speeds up the process.